WiFi Authentication with Windows NPS
This site has a new home; please follow this link:
https://www.shyju.in/posts/WiFi-Authentication-using-Active-Directory-Credentials/
- Install Windows server 2012.
Install Active Directory role.
1
 dcpromo /unattend /ReplicaOrNewDomain:Domain /NewDomain:Forest /NewDomainDNSName:wifiauth.local /DomainNetBIOSName:WIFIAUTH /SafeModeAdminPassword:P#55word/InstallDNS:Yes /RebootOnCompletion:Yes
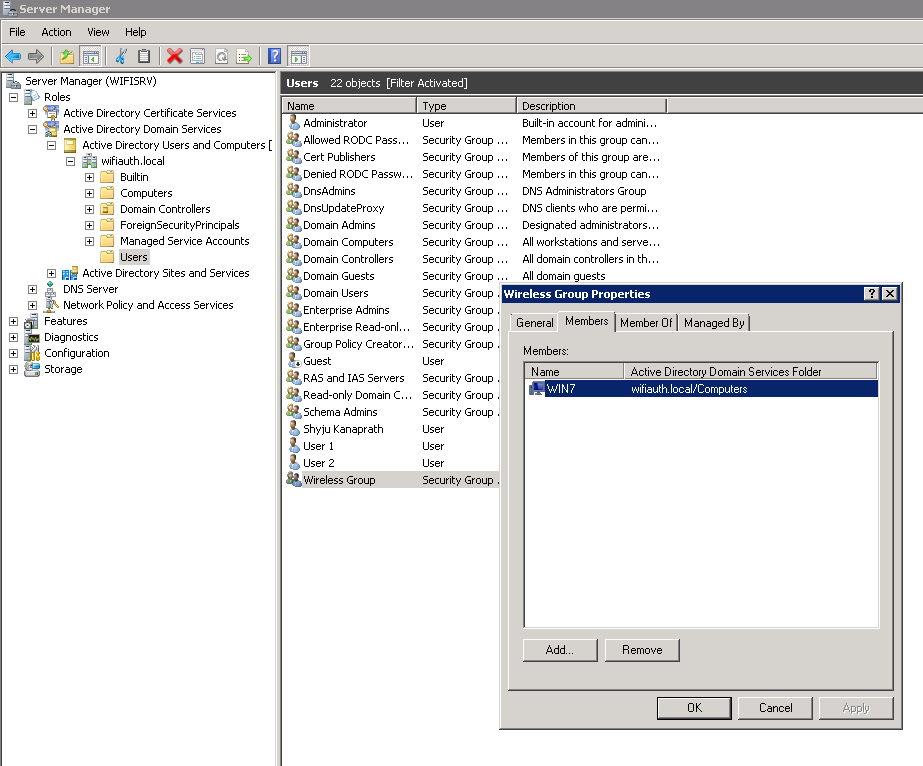
- Create wireless users or computer group and add the users/computers to the group.
 --
-- - Configure Network Policy Server(NPS)
- Open Server Manager and goto “Network Policy and Access Services”
- Goto NPS Getting Started screen
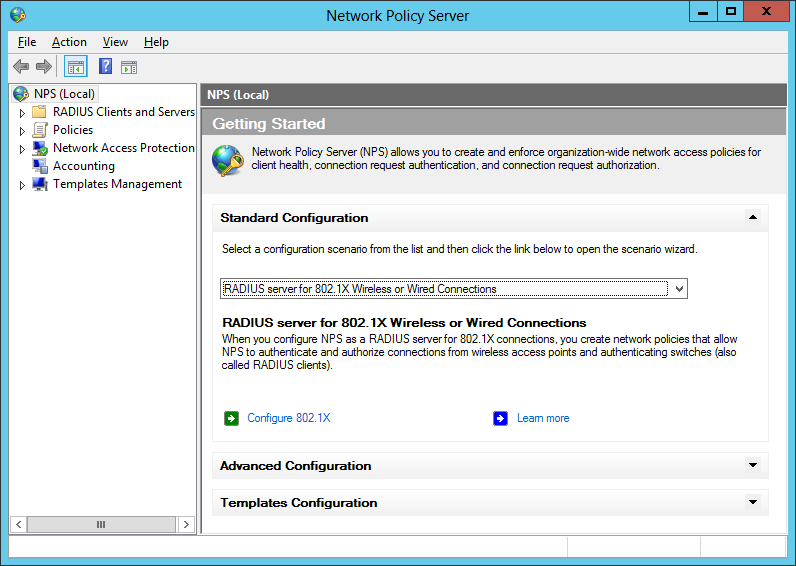
- Select “RADIUS server for 802.1X Wireless or Wired Connections” in “Standard Configuration”
- Click Configure 802.1X.
- Select Secure Wireless connection
- Add all wireless access points with a shared secret as radius clients.
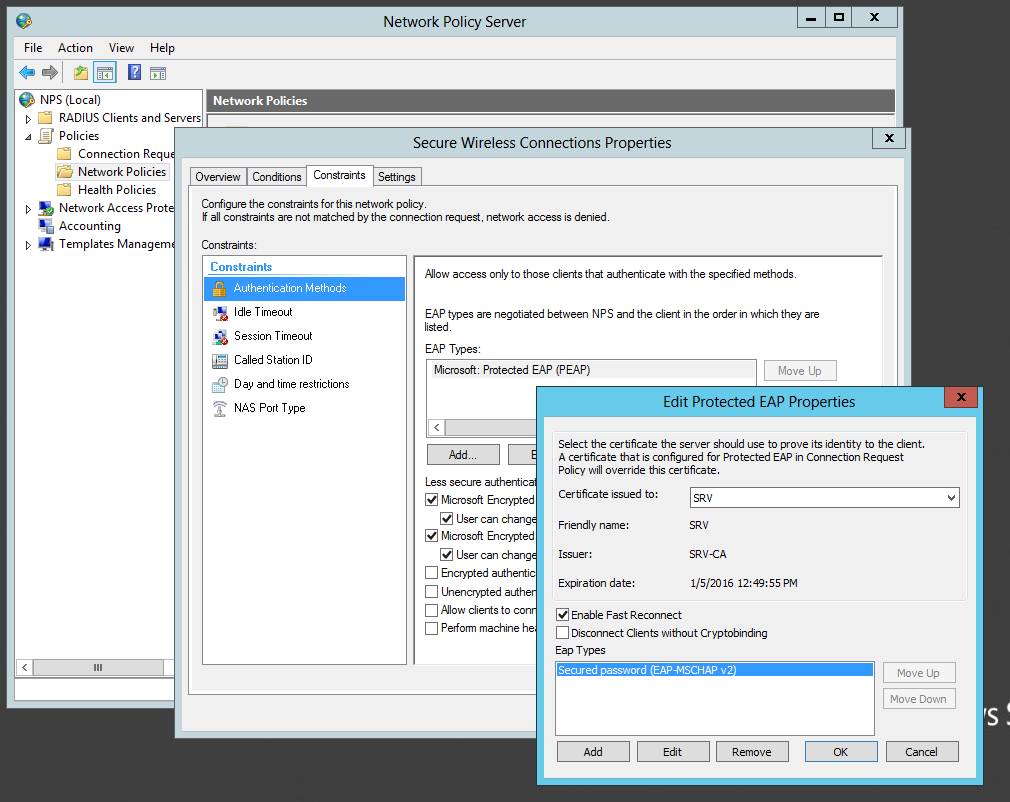
- Select Type as “Microsoft: Protected EAP (PEAP)”
- Add the Wireless Users/Computers group which you have created in step 3.
- Finish
- Create certificate for client authentication.
- Run an MMC console
- Select Certificate Templates,Certificates,Certification Authority. Select computer account and or local computer while adding snap ins.
- From the MMC console open Certificate Templates
- Right click Computer under “Template Display Name” and select “Duplicate Template” and select 2008 as the windows version.
- Change template display name something like “Wireless User’s Certificate” in New Template property’s General tab
- Click on “Security” tab add Enroll,Autoenroll permission for “Authenticated Users” & “Domain Computers”
- Click “Subject Name” tab and select “Subject name format” as “Fully distinguished name” and click OK
- Open ”Certification Authority” from the left pane and drill down to “Certificate Templates”
- Right Click Certificate Template and click New » Certificate template to issue
- Select the certificate template(Wireless User’s Certificate) you created by above steps and click OK
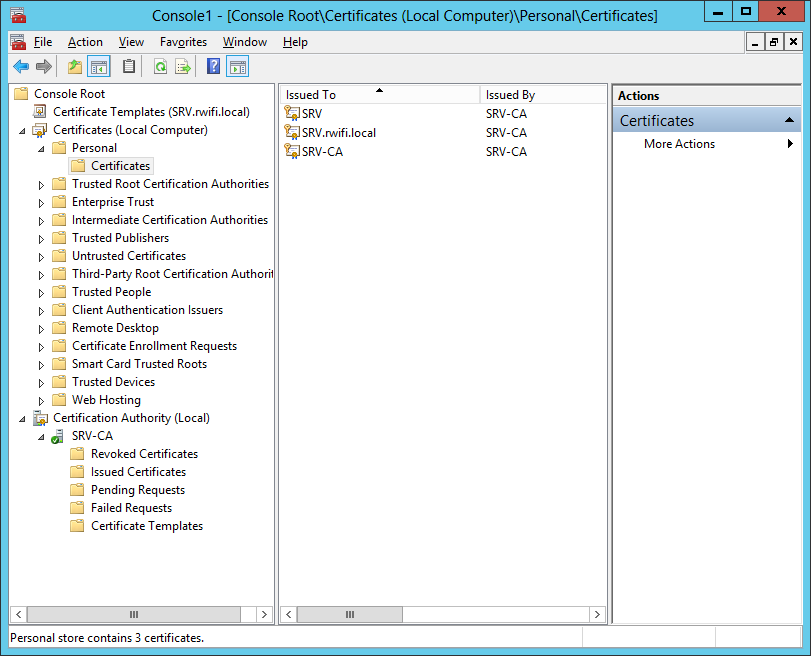
- Open “Certificates (Local Computer)” from the left pane and drill down to “Personal » Certificates”
- Right Click “Certificates” » “ All Tasks” » “Request new certificate”
- Click next 2 times and select the “Wireless User’s Certificate” which you made with above steps and click “Enroll”
Make a note of the new certificate created.
-
-
- Open Network Policy Server console again
- Goto “Policies” » “Network Policies”
- Right Click “Secure Wireless Connections” and select properties
- Click on “Constraints” tab select ”Microsoft: Protected EAP (PEAP)” and click edit
- Make sure that the “certificate issued” is the same certificate which you have made in step 5.
- Create group policy to propage the wireless settings to wireless clients in the same domain.
- Open “Group Policy Management”
- Drill down Foresst » Domain » Your domain » Default Domain Policy
- Right click ”Default Domain Policy” click edit
- Goto Computer Configuration » Policies » Windows Settings » Security Settings » Wireless Network(IEEE 802.11) Policies
- Right Click “Wireless Network(IEEE 802.11) Policies” and create new policy
- From General tab add a policy name in General tab
- Click ”Add” button and select “Infrastructure”
- Give a profile name and SSID from the connection tab. SSID must be same as the SSID in your Wireless Access Point.
- (Optional) Select the security tab and change the authentication mode to “Computer Authentication”. If you select this option only domain computers will be connected with this wireless profile.
- Configure Wireless Access Point
- Open the Wireless Access Point configuration and goto the Wireless network settings
- Create a new SSID with the same SSID name which you have made in the step 7
- Select WPA2-Enterprise and AES as the security
- Put the NPS server IP address as the RADIUS IP and put shared secret which you have made in step 4 and save the configuration.
- Add a new PC having WIFi into this domain or run command gpupdate /force from the already added PC.
- Select the Wireless SSID from the PC wireless SSID list and connect. It should connect automatically.
This post is licensed under CC BY 4.0 by the author.